
We all know Photoshop is a robust graphics editor. It has loads of tools and lets you accomplish your design tasks in various ways. One of my favorite tools is Layer Comps. I was recently introduced to this handy tool and it has helped me streamline my design process and do away with jumbled, layer-driven designs.
Layer Comps allow you to efficiently create multi-page comps, all maintained within one PSD file. One of the greatest benefits is that it allows you to apply changes globally to the appearance of your layers throughout all the Layer Comps. So instead of having to update a change to the same layer in every individual PSD file you may have created, you can change it in one Layer Comp to achieve the same end goal.
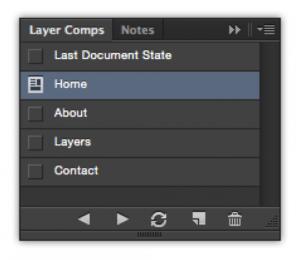
Using Layer Comps is also a great way to toggle between layer states without having to rely on blinking on and off layers and groups. For instance, you may want to indicate in your global navigation what page the user is on by styling your current navigation item differently. In your new Layer Comp, you can create a new layer with the styled navigation item and hide the original layer. The new layer will be visible in your new Layer Comp, but stay hidden in the original state Layer Comp. Therefore, you can toggle between the two Layer Comps and preserve both states without having to manually blink on and off the navigation item layer.
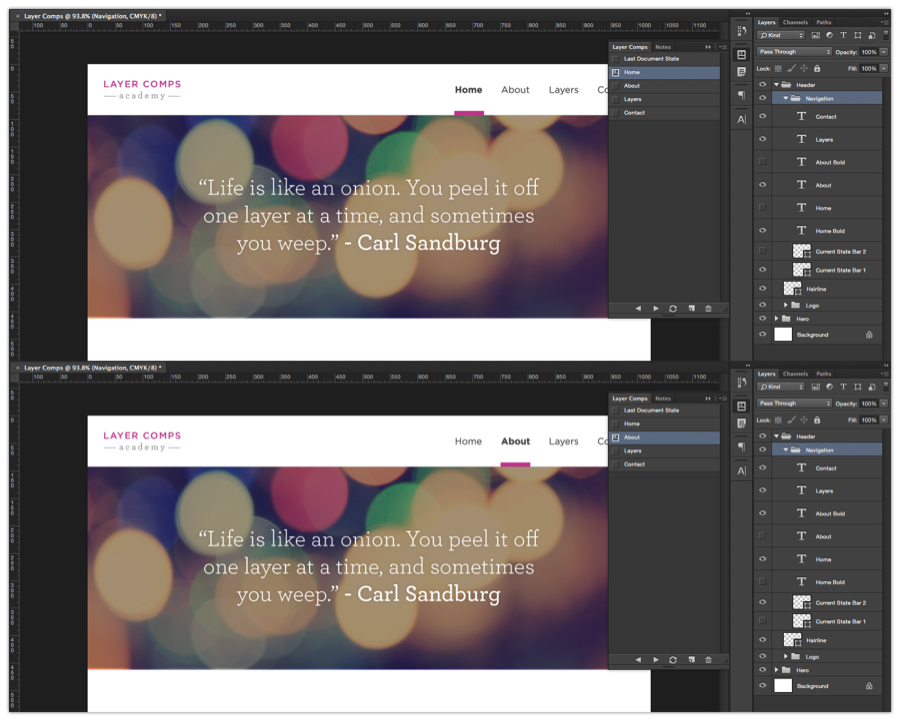
Initially, Layer Comps can be tricky and confusing, but once you figure out how to use them, you will quickly develop the necessary habits. It is important to remember that any change you make to a layer will apply globally. Therefore, you must get into the habit of creating separate layers for local changes. At first, this may be tedious, but it quickly becomes second nature.
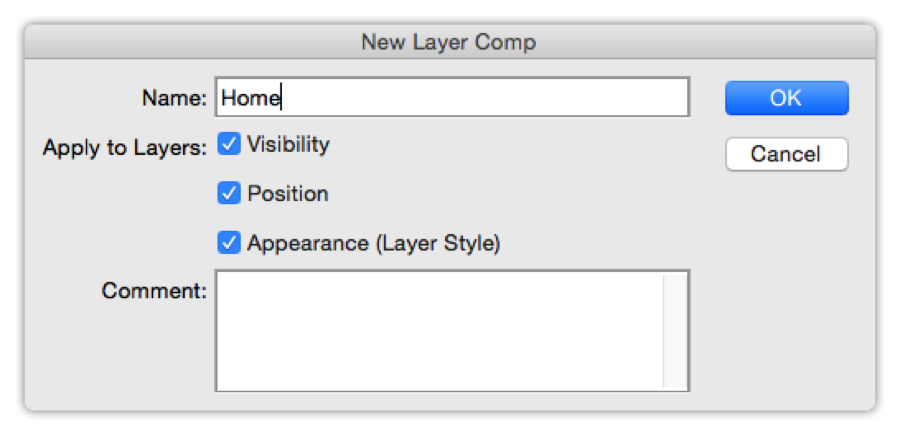
To begin, make all the layers you want in your first Layer Comp visible and click the “New Layer Comp” button. This will open up a dialog where you can name your Layer Comp, select options for tracking visibility, position, and layer style, and also add a comment. Click OK and you will now have a Layer Comp.
You can continue to add new layers and work as you normally would. You’ll notice in the Layer Comp palette though, that as soon as you make a change you are no longer in your first Layer Comp, instead you are in the “Last Document State”.
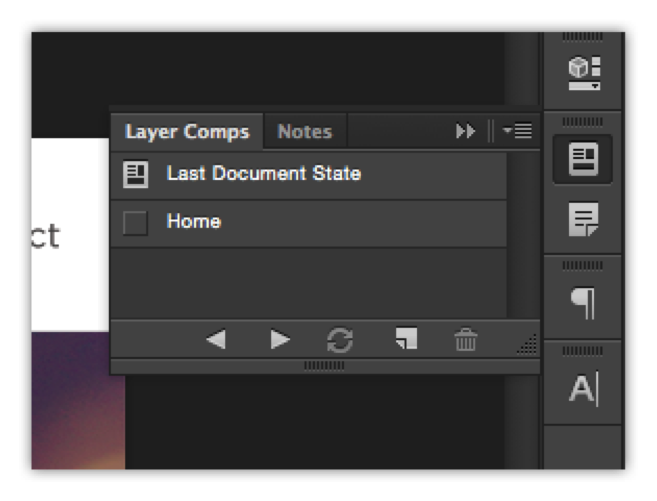
If you click your first Layer Comp your new changes will disappear. Don’t panic. Click “Last Document State” again; you’ll see your previous set of changes. In order to apply the changes you had made, you must highlight the Layer Comp and click on the rotating arrow icon to update it. This step is crucial!
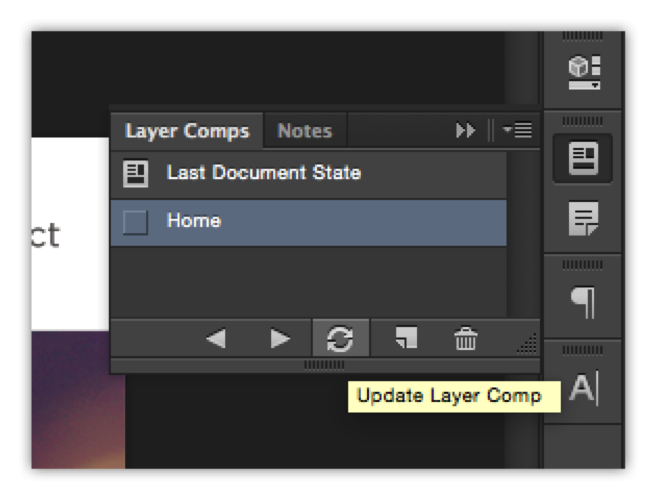
To make your next page, click the “Create New Layer Comp” icon and give it a different name. You have now duplicated your first Layer Comp and can manipulate the new Layer Comp by creating new layers or blinking on and off existing layers. Remember, you must click the “Update Layer Comp” icon to the appropriate Layer Comp you want to apply the updates to. You can also apply changes to multiple Layer Comps by highlighting more than one.
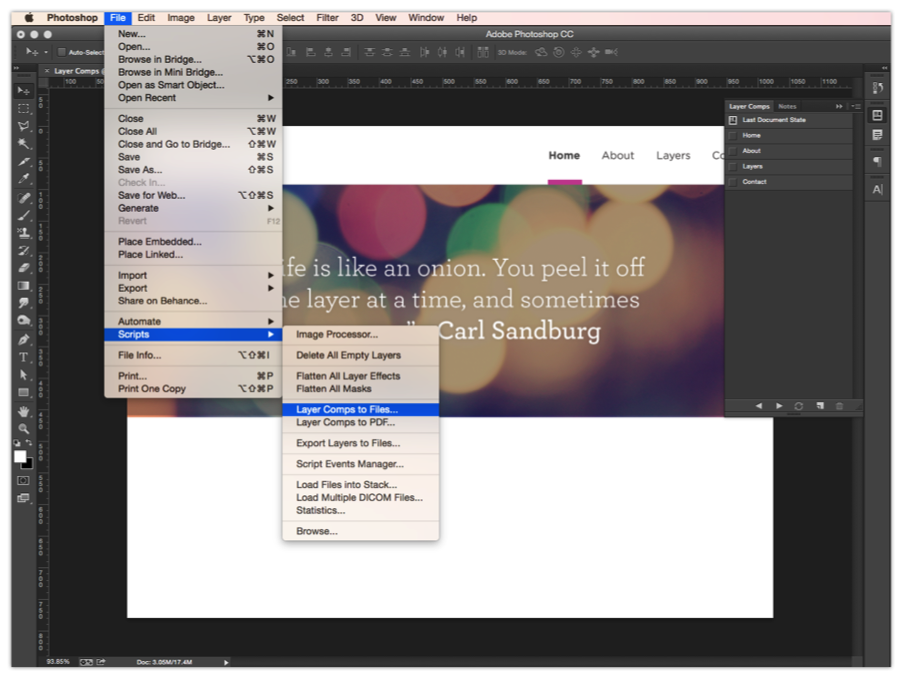
When you are ready to deliver your comps, you can run a script under File > Script > Layer Comps to Files. The dialog allows you to specify the file destination, prefix of the file name, and type of file. Now you can generate all your Layer Comps into JPG files—all from one PSD file.
Although Layer Comps have been a part of the Photoshop toolset for over a decade, not everyone knows what it is or how it works. I encourage both designers and developers to become familiar with Layer Comps and practice using them. And don’t get discouraged in the beginning. While it took me two or three days to fully grasp how Layer Comps work, I now use it on virtually every web or app design project.
Contact Us
Let's talk!
We're ready to help turn your biggest challenges into your biggest advantages.
Searching for a new career?
View job openings