


An extremely powerful new feature in SharePoint 2013 and SharePoint Online is Managed Navigation. Managed Navigation is a new option for global and context-sensitive navigation. This new feature improves search engine optimization (SEO), provides cleaner URLs, and simplifies navigation management. In this blog post, I will:
Explain how to enable Managed Navigation.
Discuss the impact to SEO.
Show how easy it can be to manage navigation.
Enabling Managed Navigation
It is very simple to enable Managed Navigation for publishing sites. First, we need to select the Managed Navigation option in the Site Settings > Navigation page (shown below).
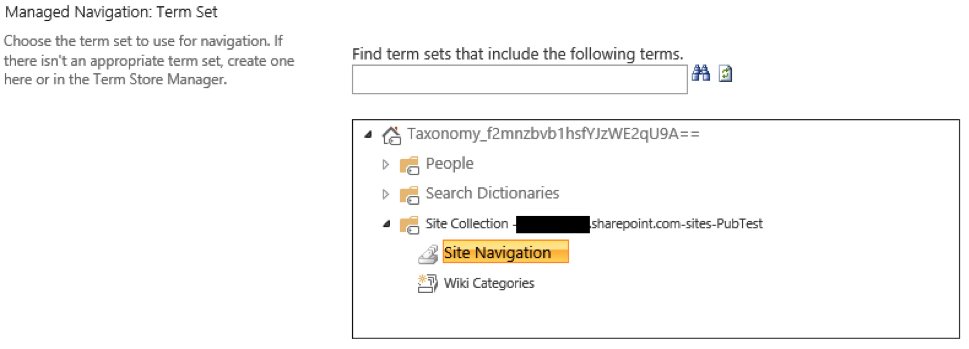
Next we need to define the Managed Metadata term set that will be used for navigation (shown below). The default term set is “Site Navigation” and it is set up to allow the same navigation across all Sites in the Site Collection.

Search Engine Optimization
The benefit to SEO can be seen immediately after enabling Managed Navigation. This is because Managed Navigation allows for “friendly” URLs. These friendly URLs no longer contain the “Pages/” folder. Likewise, the “.aspx” extension after the page name is no longer necessary. And finally, the “default.aspx” page can be dropped from the URL entirely (see below). Please note that in the example below, my test site is a sub-site. In a real-world scenario everything up to “PubTest/” would be replaced with “www.domain.com.” These cleaner URLs will help with search engine ranking by removing unnecessary terms.
Navigation Management
To illustrate how easy it is to manage navigation, I will add two pages (“Our Firm” and “Leadership”) to the site by clicking “Add a Page” from the ribbon. Once the pages are added, they will automatically appear in the global navigation as shown below.

Next, I would like the “Leadership” page to be a sub-menu item of “Our Firm.” To do this, I will modify the Site Navigation term set in Site Settings > Term Store Management. First, select the “Leadership” page/term under “Site Navigation. Next click the “Move Term” link in the context menu (shown below).
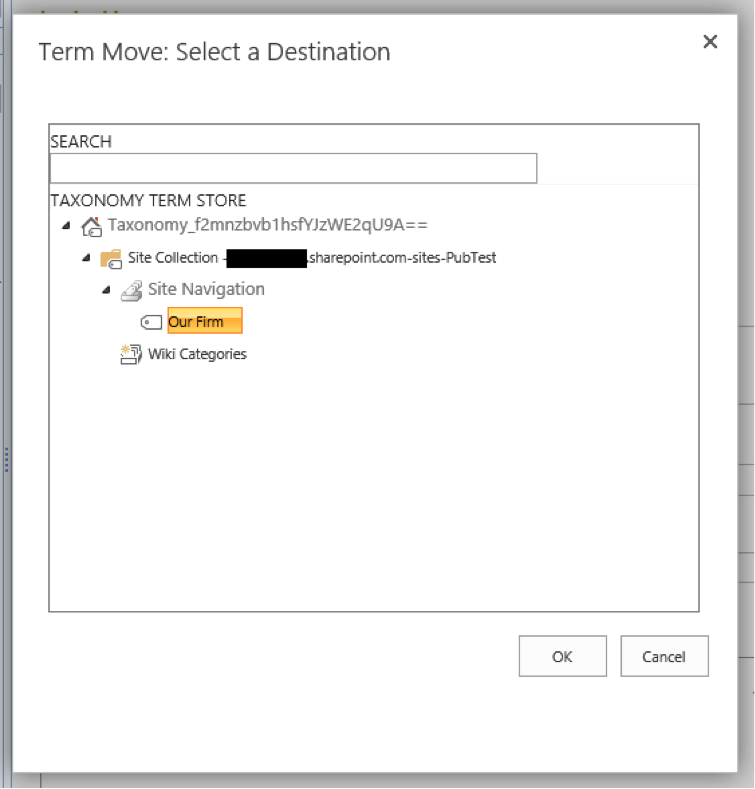
And finally, select the “Our Firm” page/term as the destination for the “Leadership” page (shown below).
When the dialog window closes you will notice that the terms have the appropriate hierarchy applied (shown below).
Now, by going back to the site, we can see that the global navigation has automatically been updated to reflect our change (shown below). Likewise, the URL was automatically updated to include the new hierarchy. So the URL changed from “/leadership” to “/our-firm/leadership.”

The navigation can also be managed through drag and drop by clicking the “EDIT LINKS” link in the navigation control (shown below).
For demonstration purposes, I will move the “Leadership” page back to the top level by dragging it back to the top. After dropping the link, we are notified that the URL will be changed and asked to confirm (shown below).
When finished making changes, click “Save” in the navigation control.
Final Thoughts
While this new feature is a great enhancement, navigation and managed metadata is only a part of a proper information architecture. When building a SharePoint site, considerable attention should also be paid to the site hierarchy, content types, and search. Likewise, Managed Navigation has its limitations, which should be considered while designing your site. For example, Managed Navigation is limited to the current Site Collection and cannot be used across multiple Site Collections.
If you are considering implementing a SharePoint site, we would love to partner with you to help you achieve your goals. If you are interested in learning how Credera can help, please contact Credera at findoutmore@credera.com.
Contact Us
Let's talk!
We're ready to help turn your biggest challenges into your biggest advantages.
Searching for a new career?
View job openings