Do you want to use System Center Configuration Manager (SCCM) to image computers over the network? Configuring SCCM for Preboot Execution Environment (PXE)-initiated deployments is a matter of enabling PXE support on the distribution points and creating and distributing a PXE-enabled boot image. But what if you are already using Windows Deployment Services (WDS) in your environment for PXE-based deployments?
This situation occurred at a recent client engagement setting up SCCM for Windows 10 deployments. The client already had WDS with PXE set up for Windows 7 and needed to be able to continue to use this until they finished transitioning to Windows 10. Unfortunately, the boot image created in SCCM can only be used with SCCM distribution points. It will not work if it is loaded to a standalone WDS server. Setting up a dual-PXE boot environment also proved troublesome.
The solution we used was to create a compatible WDS boot image from a Task Sequence Bootable Media ISO file. We then added it into the existing WDS server. This allowed the client to continue to use WDS PXE for Windows 7 while enabling us to utilize the same WDS PXE to connect to SCCM and initiate our Windows 10 task sequence. The following are the steps we used.
Step 1: Create bootable media in SCCM as an ISO file.
Go to your task sequence in the Configuration Manager Console and select Create Task Sequence Media. We are going to create bootable media as shown here.
Create Task Sequence Media
At the Media Type selection, choose CD/DVD set. This will create an ISO output file at the path you specify. After selecting your security settings, we will need to select our boot image. Here we selected our custom boot image we used for deploying Windows 10.
Boot Image Options: Select Boot Image
Select your appropriate settings for Distribution Points and Management Point.
Boot Image Options: Distribution Point Selection
We will not discuss the details of all the options for creating Task Sequence Media here. For more information, see Microsoft’s documentation.
Step 2: Mount the ISO file (double-click or right-click and select Mount).
Once the media is created, navigate to the .ISO and mount the boot media by double-clicking or by right-clicking and selecting Mount.
Step 3: Extract the boot.wim file from the sources directory.
Within the sources directory of the mounted ISO file, copy the boot image file, named boot.wim, to a working directory. In this example, we will use C:\Temp\Example
Step 4: Mount the boot.wim image using DISM.
First, create an empty directory to mount your image called Mount. We now have two items of interest in our working directory: A boot.wim file and an empty Mount directory.
For the next steps, we will need to have the Windows Assessment and Deployment Kit (Windows ADK) installed. This gives us access to the Deployment Image and Management (DISM) command line tool, which we will use to mount the image with the following command:
dism /Mount-Image /ImageFile:”C:\Temp\Example\boot.wim” /index:1 /MountDir:”C:\Temp\Example\Mount”
This command must be run from an elevated command prompt.
Mount Image using DISM
Step 5: Copy the SMS data directory from the ISO into the boot.wim.
Now we can make the necessary changes to allow this image to be used with WDS.
Go into the Mount directory and verify that we now see the contents of the boot image.
Within the task sequence boot media ISO we have already mounted, navigate into the folder named SMS. There should be a folder named data containing two files: ini and Variables.dat.
Copy the data and its contents into the corresponding sms directory on the extracted boot image. In this example, we would copy the D:\SMS\data directory (substitute the appropriate drive letter) and copy it into the C:\Example\Temp\Mount\sms folder in our boot image.
Step 6: Commit the changes and unmount the WIM.
This can be accomplished in a single command:
Dism /Unmount-Image /MountDir:”C:\Example\Mount” /commit
Step 7: Add the boot.wim as a boot image in WDS.
Copy the prepared boot.wim file to the existing WDS server, and add it as an additional boot image. Be sure to give it an appropriate name to identify it as pointing to the new image.
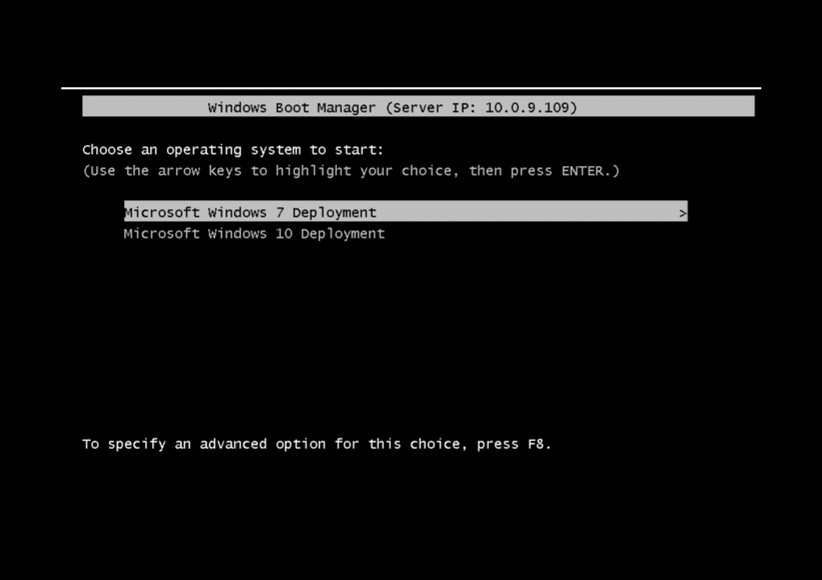
That’s all it takes. Now when computers on the PXE network perform a network boot, we have two options: Windows 7 deployments can continue as usual and Windows 10 can now be selected. In the case of Windows 10, it will utilize the WDS PXE to boot our custom boot.wim to hand the reigns to our SCCM task sequence.
PXE Boot Screen
SCCM implementations can be cumbersome when dealing with legacy systems that have to continue to operate during the deployment phase. If your organization is looking to leverage SCCM for a Windows 10 initiative, Credera has extensive experience planning and executing successful Windows 10 adoption strategies for our clients. If you have questions about this post or would like to discuss cloud and infrastructure solutions, contact us online or comment below.
Contact Us
Ready to achieve your vision? We're here to help.
We'd love to start a conversation. Fill out the form and we'll connect you with the right person.
Searching for a new career?
View job openings
